
How To Add Iptv Channels To Receiver
IPTV or Internet Protocol Television allows you to stream television channels via the internet connection. One of the advantages of IPTV is that it is accessible through a range of devices such as smartphones, tablets, and set-top boxes. However, to access IPTV channels, you need to install an IPTV receiver or set-top box. In this article, we will guide you on how to add IPTV channels to your receiver.
What is an IPTV receiver?
An IPTV receiver is a set-top box that is used to watch IPTV channels. It connects to an internet connection to provide access to IPTV channels. Once you have an IPTV receiver, you will need to add channels to stream content.
Adding IPTV channels to an IPTV Receiver
Adding IPTV channels is a straightforward process. There is no need for any technical skill or knowledge.
Step 1: Find the IPTV provider
First, you need to find an IPTV service provider. There are free as well as paid IPTV services available on the internet. Most IPTV providers offer a free trial period so that you can test their service before subscribing. Also, you need to ensure that the IPTV provider offers the channels you want to watch.
Step 2: Choose the IPTV receiver
Once you have decided on the IPTV provider, the next step is to choose an IPTV receiver that supports the IPTV service. There are different types of receivers available in the market, and each has its own features and functionalities. Make sure that the receiver you choose supports the IPTV service you have selected.
Step 3: Connect the IPTV receiver to the TV
After selecting the IPTV receiver, you need to connect it to the television. Most of the IPTV receivers come with an HDMI cable, which you can use to connect to the TV.
Step 4: Configure the IPTV receiver
Next, you need to configure the IPTV receiver. You can do this by selecting the network configuration option and connecting it to your home network. Enter the Wi-Fi password or Ethernet connection details if required.
Step 5: Add IPTV channels to the receiver
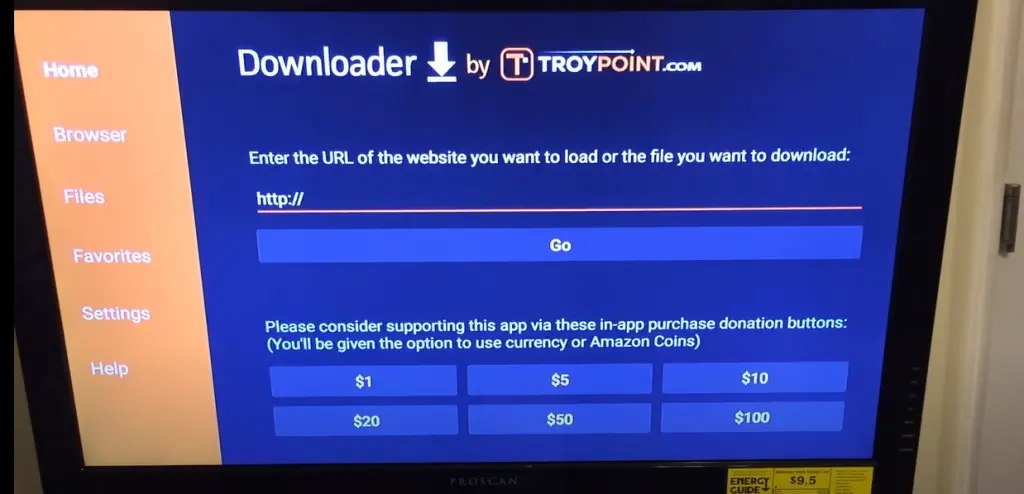
After configuring the IPTV receiver, you need to add channels to the receiver. You can do this by following the instructions provided by the IPTV service provider. Usually, they will provide you with a playlist URL or M3U file. You need to add this URL to the IPTV receiver.
Step 6: Enjoy IPTV channels
After adding the IPTV channels, you can start watching TV channels on your IPTV receiver. You will have access to different channels based on the IPTV service provider that you have chosen.
Conclusion
Adding IPTV channels to the receiver is a straightforward process. You need to find an IPTV service provider, select an IPTV receiver, configure the receiver, and add IPTV channels to the receiver. Once you have completed these steps, you can start enjoying IPTV channels on your television. Remember to choose a reliable IPTV service provider and a compatible IPTV receiver to enjoy uninterrupted streaming of your favorite channels.
Get your subscription today: iptvuk.uk